Wednesday, February 29, 2012

Scrapy Duck!


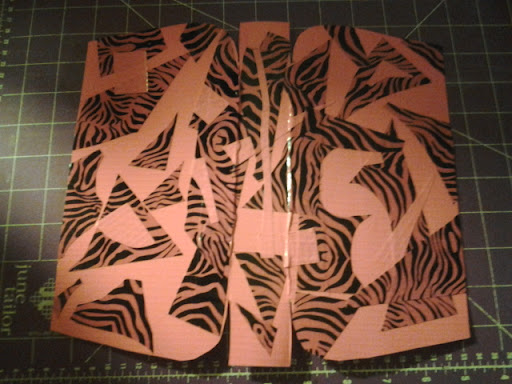
I took the left over scraps from the pink zebra and randomly placed it over the purse base. This was to. Cover up the tabs as well as to decorate it. I even used the solid pink scraps that i cut from the sheets. Great thing about working with duct tape....no waste. Stay tuned for part 4 when i should be more complete the construction of the sides. I have 6 pieces of pink zebra left so i will use it on the sides.

Duct tape purse

I traced the left side of the insert of the baggallini monaco clutch on a duck brand duct tape sheet. Then using the top line as a guide...I repositioned and traced the right side. Then I cut out what is the basis of a smaller purse. I used this smaller piece on another sheet of duct tape and used it as a pattern. The rectanges that were left over...don't throw those away...that's gonna be the bottom...and sides.

Gonna cut slits up 2 guide squares x 1 guide square over to give me the attachments for the base. I cut the curved ends off of the base....folded the sheet into position just to be sure it lines up....then I'm gonna go from there. The accent pieces will cover the tabs in finished product.

http://purplebutterfly-peepla.blogspot.com

Monday, February 27, 2012

Hubcaps with bling...installed.


 Watch "286. hubcaps with bling...installed!" on YouTube okay...ya...I went and had them professionally installed but how else would I learn how to do it? Seems its more to it than seating a retention ring and popping them on...you have to line up the valve stem and use a placement method that would have zapped some finger nails. Hahaha I was not willing to do that. The old hubcaps were not lined up and thats why it made the irritating noise...and also why the one tire kept getting a leak....the non lined up retention ring was rubbing against it all the time.

My tech said, "ummm....heres a sharpie...you want to sign those? They are unique." I said, "yes...sure do." So each are signed and dated with todays date and as he suggested....im calling my insurance company and having them added. Seems they are no longer 20.00 hubcaps, they are art...worth what ever I say the replacement value is. Ha who knew! Replacement value....these cant be replaced! I could design more but i can replace these. Anyway....get yourself some supplies...close your eyes and say "what do you want to be?" Then decorate your hubcaps according to the answer that pops into your brain.

I made sure to drive past a few mirrored buildings on the way home so I could peek at them...when the car is in motion....it looks like a rim of pink...then when slowing down...the design becomes prominent. Just as I had imagined it would. I love when an ideal comes to fruition!


Sunday, February 26, 2012

Duct tape hair clip


 Watch "285. duct tape hair clip" on YouTube Got duct tape? Got a spare hair clip? Then you got a new acessory! Watch the vid and make one for yourself. This was made with scarps of duck brand duct tape sheets, but can very easily be made with roll tape.


The magic of Crisco


 Watch "280. Crisco twistout" on YouTube 

I have used Crisco for years on my hair as a "hair grease" substitute. Never occured to me to use it like a setting gel to do twist outs or wash n gos until i seen the results others were getting with a hairstyle called a "hair grease twist out" so I figured I'd give it a try. The experiment was not only an outrageous success...its now my go to style. I spent the day dodging and ducking folks trying to touch my hair! Even my own daughter, who said "I know you hate that, but its so pretty!"  Anyway...check it out and give it a try. Just know...it works....and you use less than if you were trying the hair grease version of the style. Who knew!

Also important to mention....this style took 5 mins to do after the hair was dry. 5 mins and out the door is a style I can deal with.

Hubcaps...with bling!


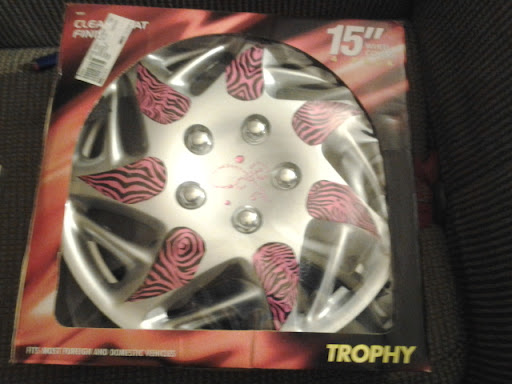
 Watch "283. Hubcaps...with bling!" on YouTube added a pop of color in a unusual place. Here i show the hubcaps. This was a fun project...i may do it again for friends and family. Someone said, "an artist isnt a special person, every person has a special art." So...have I found my special art? Maybe not, as I have always thought that would be knitting related. Have I found an addictive new hobby? I think so!

The process for simply adding color...painting hubcaps, was a bit much, as it involved removing the finish and sanding, and such ....and what if it didnt work out? I used duck tape....if it doesn't work out...i can redo it and the finish of the hubcap isnt compromised....so i can do this again and again...at will.

Monday, February 20, 2012

Blocking by boiled water

Ya...this is not the best choice to try something new on...but my steam iron died on me. This is acrylic...dipping in boiling water like wool...not an option. So I pinned it to measurements and slowly poured slightly cooled boiled water on it. Needless to say...I did this outside. The pouring did shift the lace out of place where the water first hit...guess I was. Standing too high, pouring to fast, or some such factor. This is the feather and fan stitch however, so I swept my hands in the direction of the waves. For the most part....its back in position...not much warp. When it cools down more....I will try and reshape where needed.

Then it will dry for at least 24 hours before I even attempt to unpin, wash, etc. If this works out....I may have a quicker way of blocking large objects. For right now....I'm only interested in killing this acrylic with minimum detriment to the lace. Heat kills acrylic....usually via steam, boiling water is steam before the rise. So here's hoping its a good idea.

http://purplebutterfly-peepla.blogspot.com
Sunday, February 19, 2012

Freestyling finished

Here is the fnished product. I tried to get it at every angle.

http://purplebutterfly-peepla.blogspot.com

Feathher and fan with picot border...almost done

Almost ready to blocke it. Its that close to being done. I'm looking at maybe 4 or 5 pm that it should be finished. Then it will block until dry. Then it will be washed, giftwrapped and ready to go!

It won't be gifted till March but hey....I'm happy its ahead of schedule without that rushed feeling.

http://purplebutterfly-peepla.blogspot.com

Friday, February 17, 2012

Freestyling my hair!

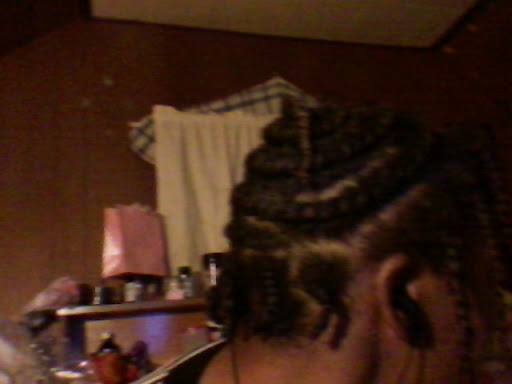
Place a random braid somewhere....then continue brading working around the first one, changing directions as needed. Continue until all hair is braided. This makes for interesting patterns that's never the same twice. Freestyling. Planned styles don't have eye catching effect that freestyle does. Try it.

http://purplebutterfly-peepla.blogspot.com

Thursday, February 16, 2012

Sealing: creamC vs Moisturizer


The left side of my hair...I used 14 n 1 miracle worker by hawaiian silky. Love that stuff. The right side...I used CreamC..which is Crisco Shortening. Love that even more. As you can tell...the right side is higher. The left side looks as defined as the right. You must use more, about 2 or 3 tablespoons, but it costs a reasonable 4.99 for a 16 oz container. Crisco however....you use maybe a tablespoon, it costs 3.49 for a 16 oz can...the consistancy of which...solid...like a shea butter. Lasts much longer. I use both...for different reasons...try them and see what works for you.

Wednesday, February 15, 2012

Quilted jacket

Back in the day...when I had patience for such things....I decided to "quilt my world" which included covers, couch, clothes, shoes, etc. And at some point, this leather jacket. Quilting a premade leather jacket isn't as easy as you'd think cuz it included separating the lining....punching the leather to lace the pieces on...since a needle wouldn't easily go thru the leather but would stab your fingers instead.. I had this amazing fabric from Ghana so I quilted it into carpenter wheel diamonds...after the carpenter wheel was finished....I put the left overs on this jacket. Then it was misplace during the move and found today....in the bottom of a storage box...with 3 other wiinter coats. I tried it on...sleeves are now too short becuz in 24 years....I've gotten taller. And I can't zip it cuz my waist....has gotten wider. Hahaha

I am going to finish it and then decide if I'm gonna sell it or shrink my body to fit. Maybe I'll give it to one of my kids...don't know yet.

http://purplebutterfly-peepla.blogspot.com

Tuesday, February 14, 2012

LOTW: knotted mohawk updo


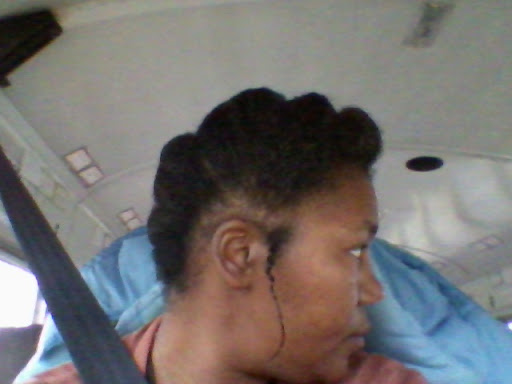
Look of the week...a tutorial vid will follow soon. Believe it or not...this hair style only takes 7 mins to do. It will last for a week. The longer your hair, the bigger the the resulting mohawk. This hair style requires a single bobbi pin or clip for the pompadour....whats more, this makes your profile look great.

This style can be done at night, wrapped and worn the next day. That way no rushing for the morning commute.  Stay tuned.

Sunday, February 12, 2012

Yo yo drama hair clip


Ya....familiar name. These are the yo yos left over from the yo yo drama necklace....only this time....I made a hair clip.  To duplicate, You will need 9 yo yo's (made from 2 inch circles...finished size=1 inch)...arrange and stitch them as desired into a template. With or without a backing. 1 duck bill clip...full size. A glue gun. Needle and thread if desired.

Line up the yo yos in the desired location on the clip. Use a couple of pins to hold the location thru the holes in the top of the clip. Heat up the glue gun....and apply a strip of glue on the tip half of the clip....press the yo yo template into the glue and hold till dry. Remove the pin before glue dries. Next lift the other side and repeat the process. Hot glue can lift in time, paticularly if you have oily hair or use a lot of product...so reinforce with sewing or more glue. If desired....use some needle and thread to reinforce the template into place taking care to hide stitches on front side. If you used a backing...keep the stitches on the backing and you wont have to worry about hiding the stitches on the front. You are done. Take a pic and share your work.

http://purplebutterfly-peepla.blogspot.com

Construction tips, watch video: tips on crafting.